 Save
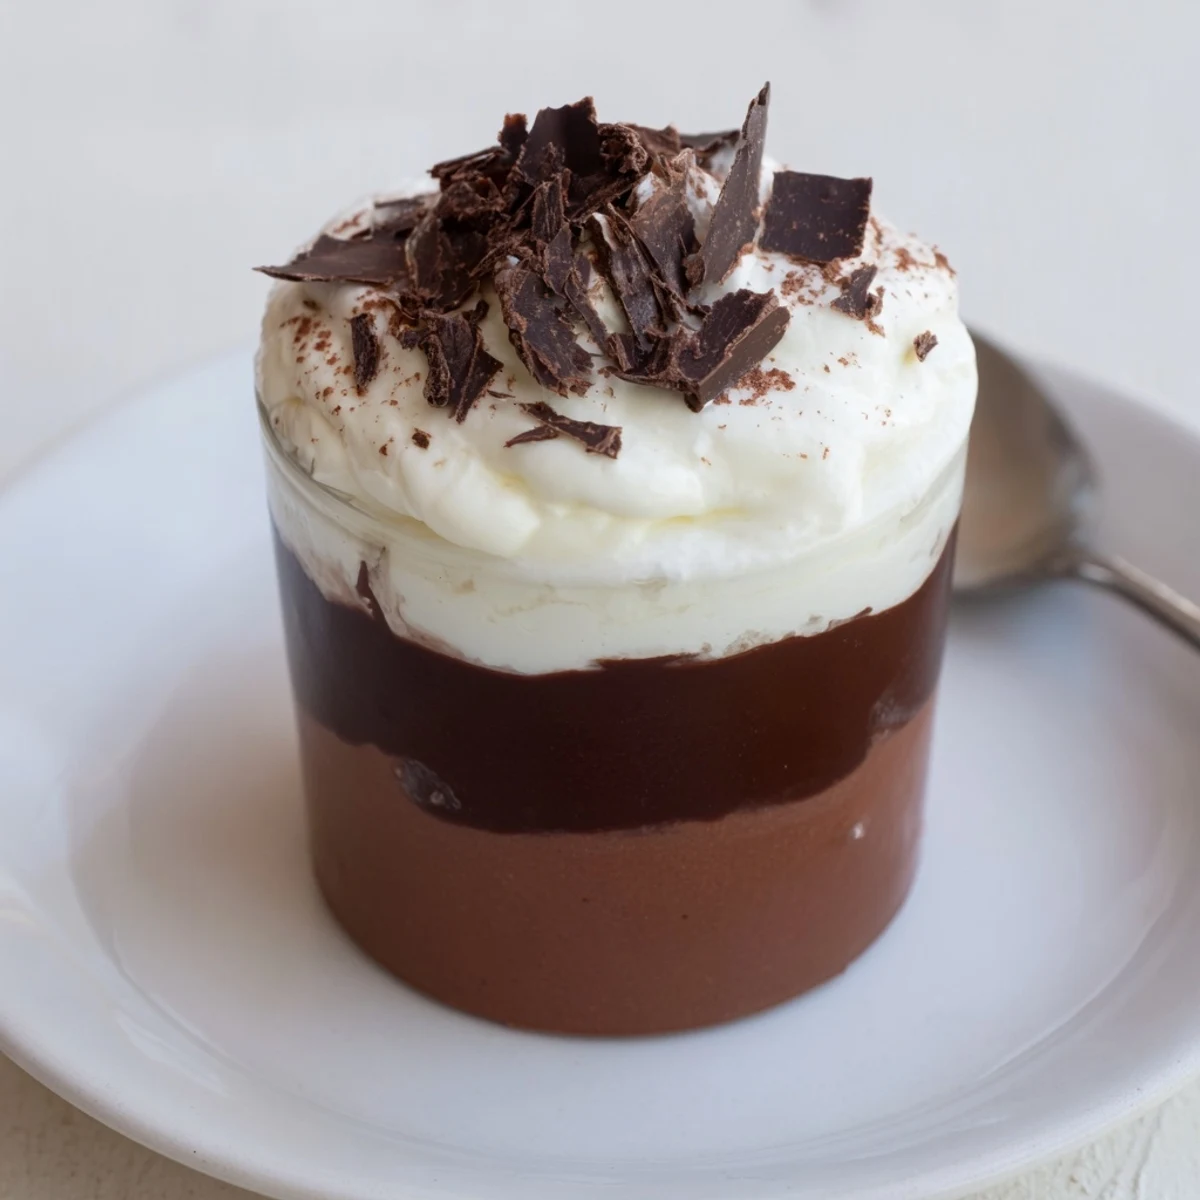
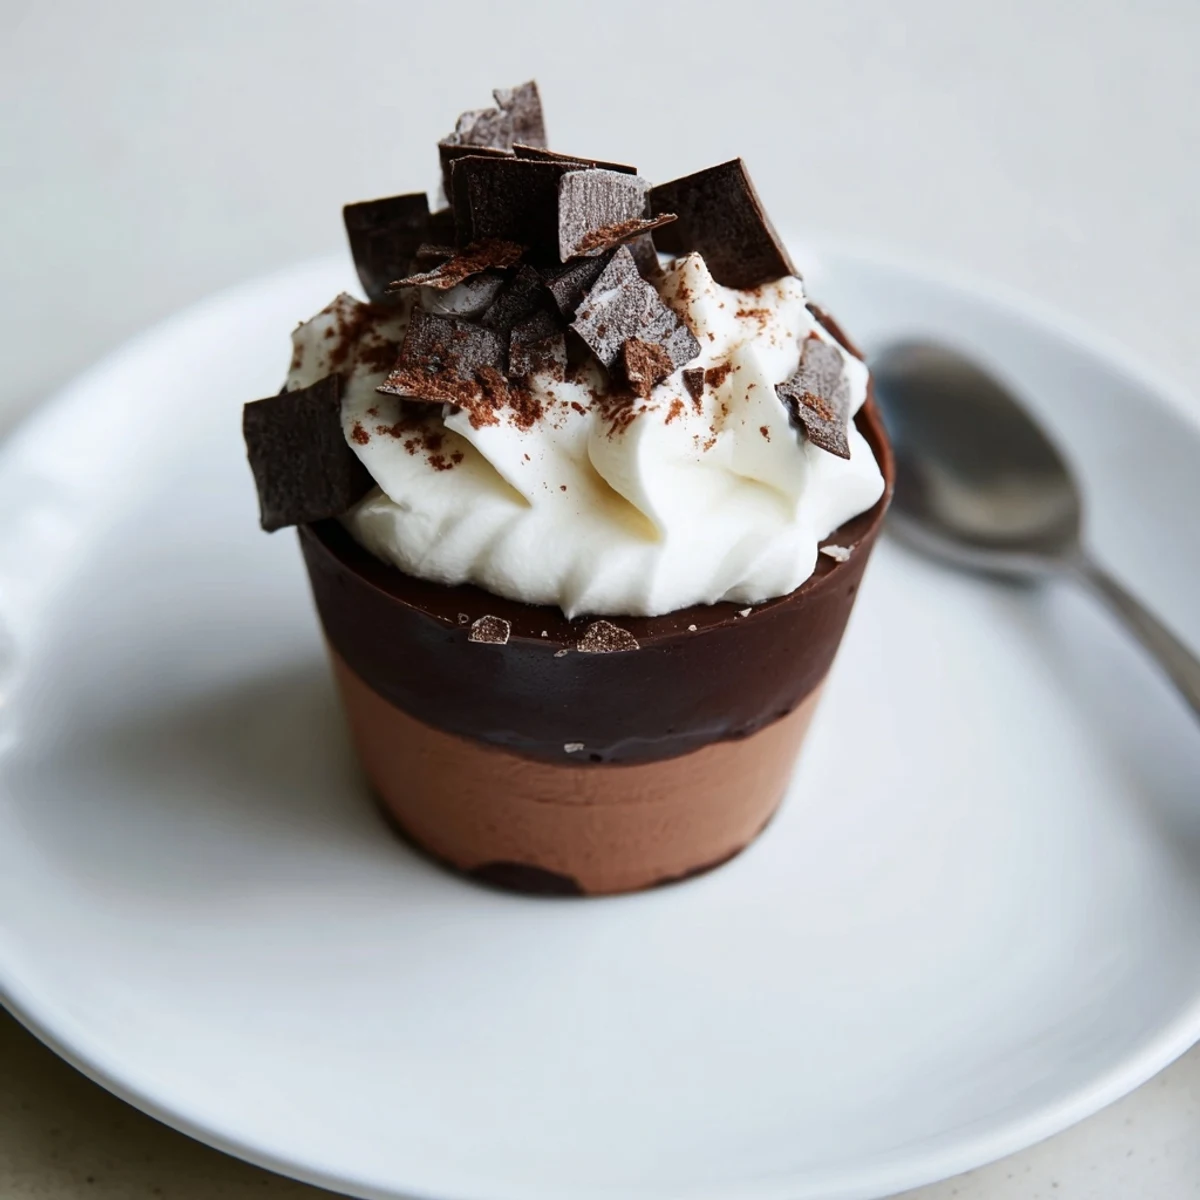
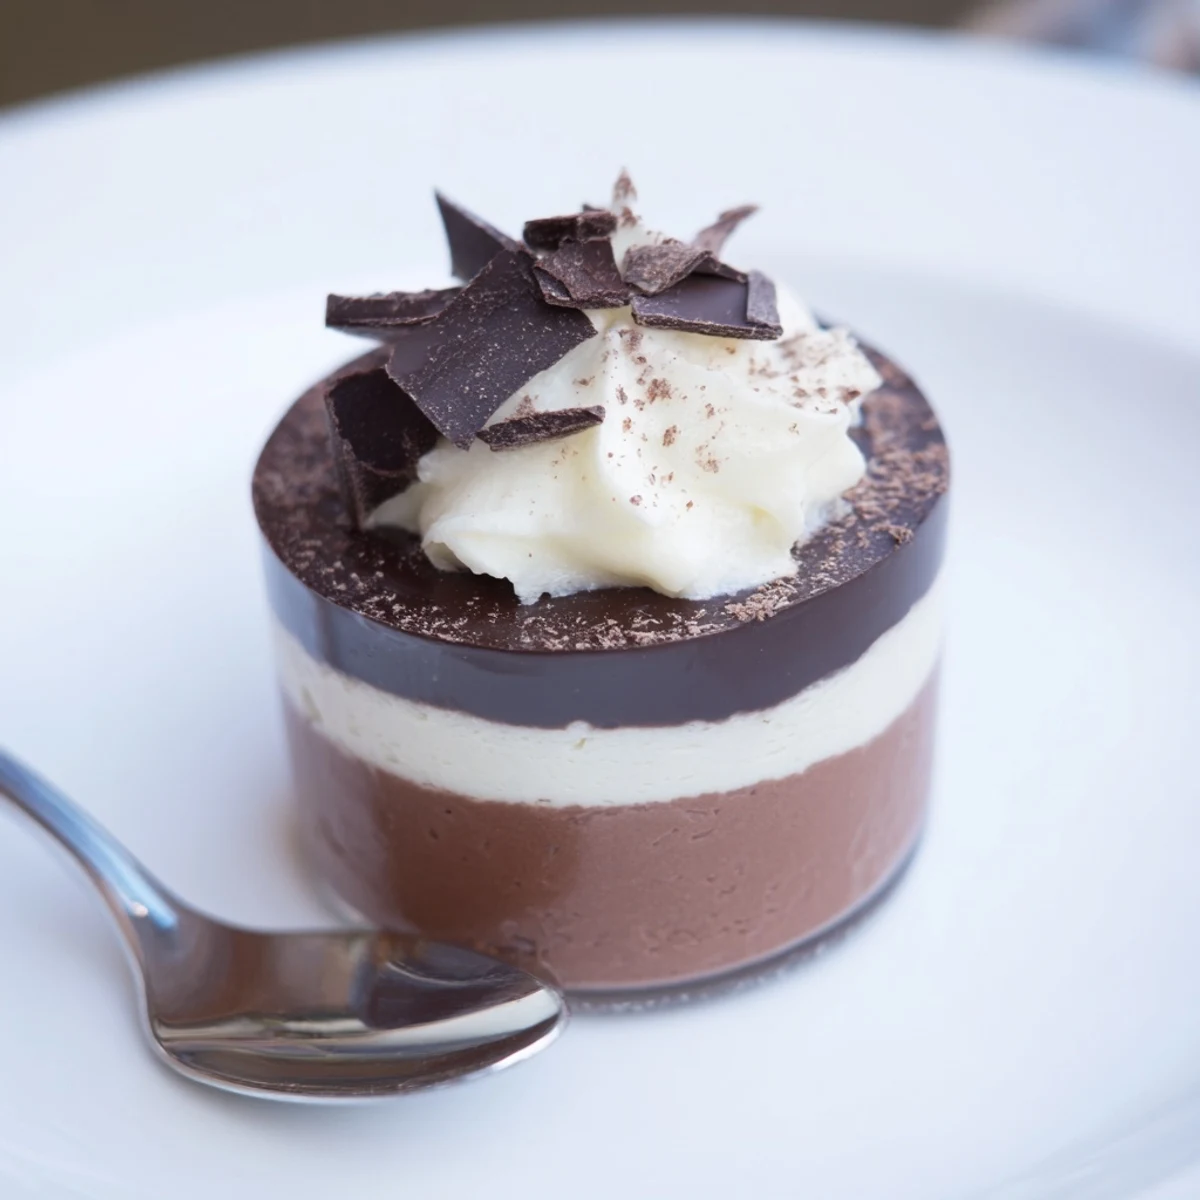
Save Layered dark, milk and white chocolate mousses are prepared separately by melting chocolate, folding with egg yolks and sugar, then incorporating softly whipped cream to retain air. Spoon each mousse into cups in succession, chilling between layers to set. Finish with shaved chocolate or cocoa. Techniques: bain-marie melting, gentle folding, and optional coffee liqueur in the dark layer for depth.
There are days when the lure of making something visually stunning outweighs any concern for the extra dishes–these Triple Chocolate Mousse Cups were born on just such a Saturday. The kitchen was filled with the sound of clinking bowls and the scent of melting chocolate, each layer a small act of delicious anticipation. The simple joy of watching silky mousse pile up in delicate glasses makes this dessert feel like a miniature celebration. It's astonishing how a trio of mousses, so decadent on their own, unite into something even more magical.
The first time I assembled these for friends, I remember the playful debate over which chocolate layer was the favorite. Some swore by the deep intensity of the bottom, while others were all about the creamy lightness on top. It turned into a little tasting adventure right at the table, with plenty of laughter over which spoonful was the ultimate bite. Since then, it's the dish I bring when I want to create a little friendly competition and a lot of delight.
Ingredients
- Dark chocolate (minimum 60% cocoa): Deep and bittersweet, it lays the groundwork for a truly decadent base; always chop it finely for smoother melting.
- Milk chocolate: Warmer and slightly nostalgic, its gentle sweetness bridges the two bold flavors; using quality chocolate really stands out here.
- White chocolate: Sweet and creamy with a vanilla note, it’s the crowning layer – be careful with the heat or it may seize.
- Large egg yolk: Gives richness and stability to each mousse; I separate eggs while they're cold so the yolks stay intact.
- Sugar: A touch in every layer rounds out the flavors; don’t skip whisking until the mixture is truly pale and fluffy.
- Heavy cream (cold): Essential for that luscious, airy texture; keep the cream and bowl chilled so the mousse whips up dreamily.
- Shaved chocolate or cocoa powder (optional): Adds a final flourish and hint of drama just before serving.
Instructions
- Start the dark chocolate layer:
- Gently melt dark chocolate in a bowl set over barely simmering water, swirling occasionally, until just smooth and glossy. Let it cool so it’s just warm to the touch.
- Whisk yolk and sugar:
- With a hand whisk or mixer, beat the yolk with sugar until it thickens and lightens, becoming almost mousse-like by itself.
- Combine chocolate and yolk:
- Fold the cooled chocolate gradually into the yolk mixture, moving gently to keep everything airy.
- Whip and fold cream:
- Whip the cold cream to soft peaks – watch for the moment it holds shape but is still silky – then fold into the chocolate mix with a spatula. Spoon or pipe evenly into six serving cups and refrigerate while you prep the next layer.
- Repeat with milk chocolate mousse:
- Melt, cool, and combine the milk chocolate with its yolk and sugar, fold in soft whipped cream, then gently layer onto the chilled dark chocolate. Return to fridge until it firms up a bit.
- Finish with white chocolate mousse:
- Handle the white chocolate gently as it melts; cool, mix with the yolk and sugar, then blend in cream. Spoon or pipe this smooth, sweet mousse over the milk layer and chill all cups for at least 1 hour to set.
- Garnish and serve:
- Before serving, scatter with shaved chocolate or sift cocoa powder over the tops. That last flourish always surprises someone at the table.
 Save
Save There was an afternoon where these mousse cups turned impromptu into a celebratory dessert for a friend's promotion – we all ended up standing around the kitchen counter, chocolate flecks on our faces, grinning like kids. It's the kind of recipe that seems to make special moments even if you didn't plan for them.
On Choosing the Right Chocolate
I once used a bargain chocolate out of curiosity, and while the mousse still set, the flavors just didn't shine. A little extra spent on good chocolate makes every layer taste distinct. Read ingredients: chocolate bars labeled as ‘couverture’ or high-percentage cocoa work wonders here.
Making It Ahead Smoothly
These can be a lifesaver for parties since they hold beautifully in the fridge overnight. Cover each cup loosely with plastic wrap to avoid condensation or fridge odors sneaking in. No one could ever guess they were made the day before – if anything, the flavors meld even better with time.
Quick Kitchen Cleanup Tactics
Mousse recipes mean multiple bowls, but seizing the moment to wash one while another chills keeps the kitchen madness under control. I stack the used whisks and spatulas in a bowl of hot soapy water as I go and save myself a mountain of cleaning later. There’s always time to sneak a taste from the spatula, too!
- Let the mixing bowls cool before starting a new chocolate, or the next layer may not whip properly.
- Lay a dish towel under your serving cups for easy chilling and transport.
- Hold off on garnishes until just before serving so they stay picture perfect and texturally crisp.
 Save
Save Chocolate mousse always promises a moment of pure pleasure – and making them in layers means there’s something for everyone with every spoonful. Here’s to chocolate, laughter, and desserts worth lingering over together.
Recipe Questions
- → How do I melt chocolate without seizing?
-
Use a bain-marie or microwave in short bursts, stirring frequently. Keep water away from the chocolate and remove from heat while still glossy to prevent graininess.
- → Can I prepare the components ahead of time?
-
Yes. Prepare mousses separately and refrigerate up to 24 hours. Assemble cups shortly before serving for best texture, or keep assembled cups chilled up to 1 day.
- → How do I achieve a light, airy mousse?
-
Whip the heavy cream to soft peaks and fold gently into the chocolate base to retain air. Keep ingredients cold and avoid overfolding or overwhipping.
- → Are there safe alternatives to raw egg yolks?
-
Use pasteurized egg yolks for safety. For egg-free versions, stabilize whipped cream with gelatin or use a cooked custard base to replace raw yolks.
- → How can I layer cleanly without mixing colors?
-
Spoon or pipe each layer gently and chill briefly between layers to set. A small offset spatula helps smooth edges and prevent blending.
- → How long do the chilled cups keep?
-
Store covered in the refrigerator for up to 48 hours due to eggs and dairy. Avoid freezing assembled cups, as texture can be compromised.
