 Save
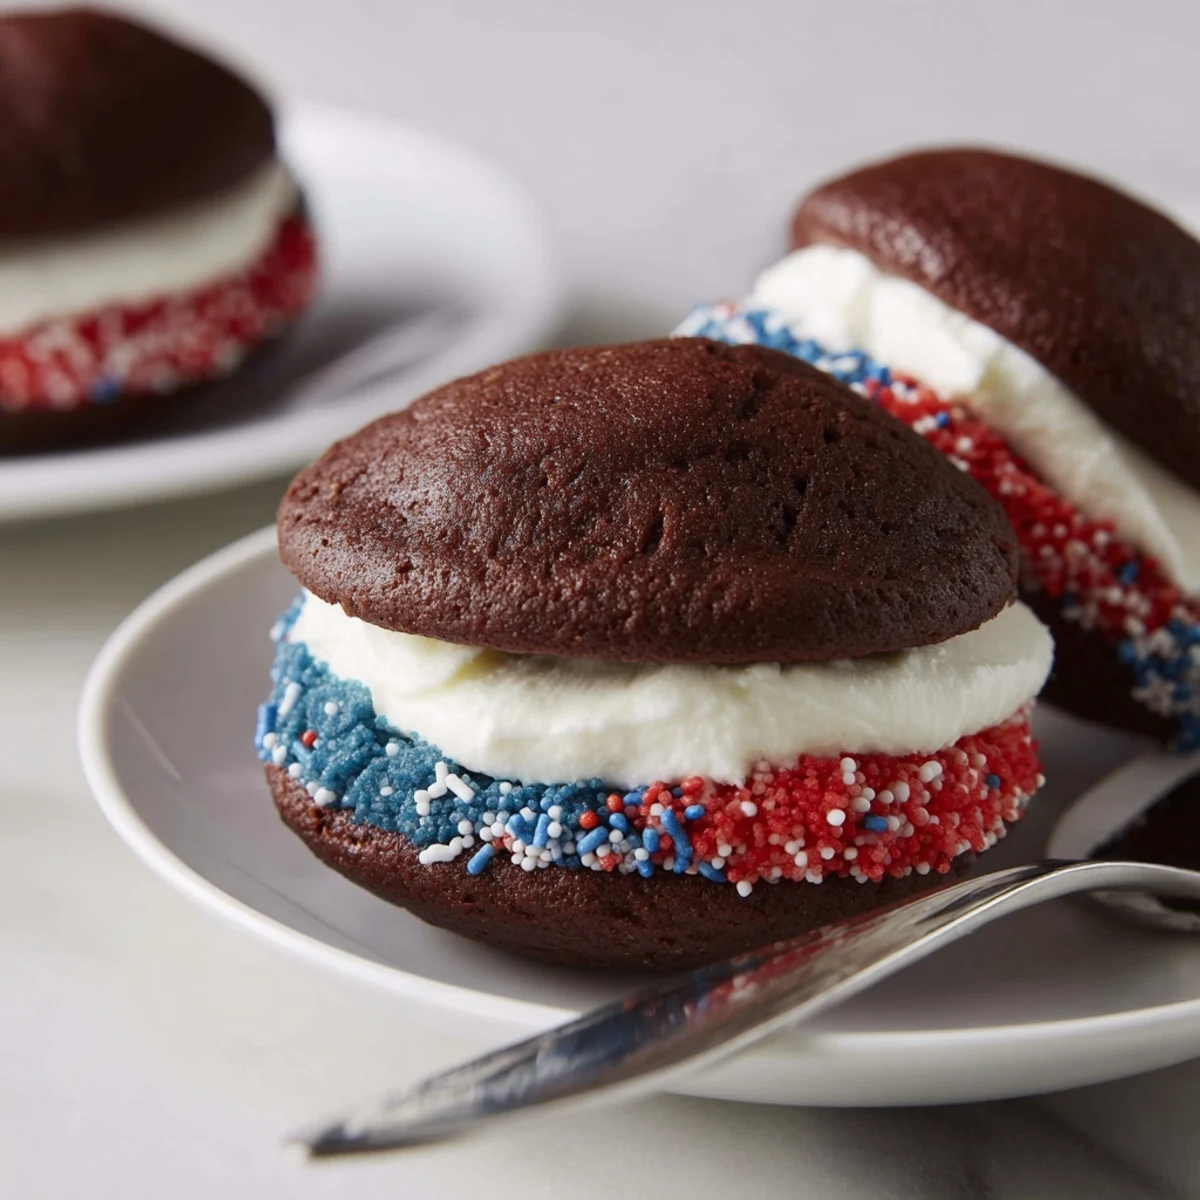
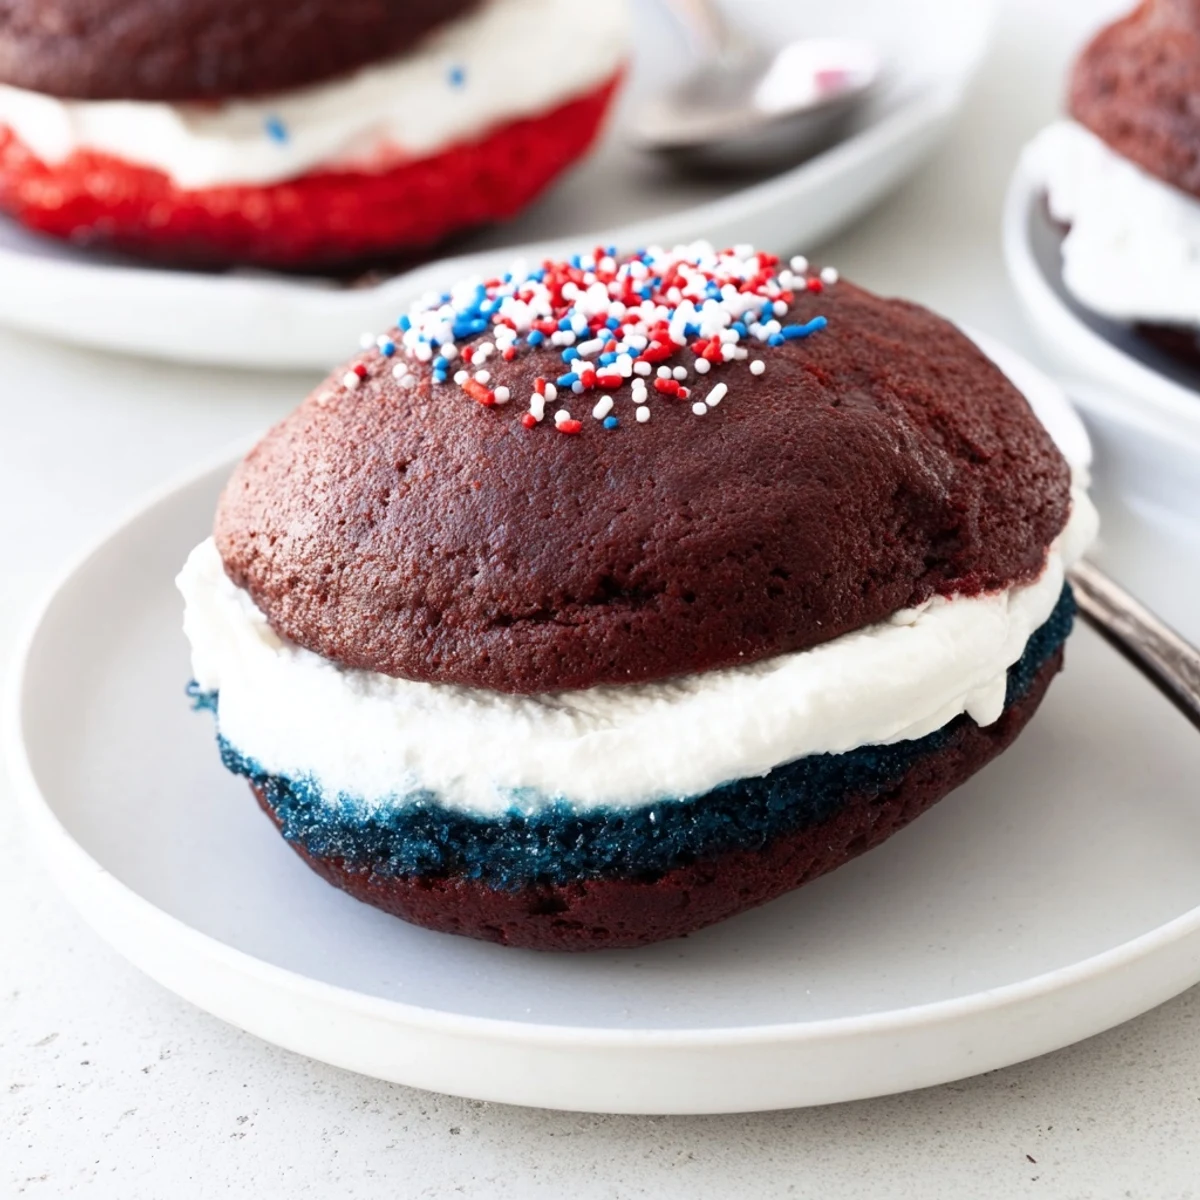
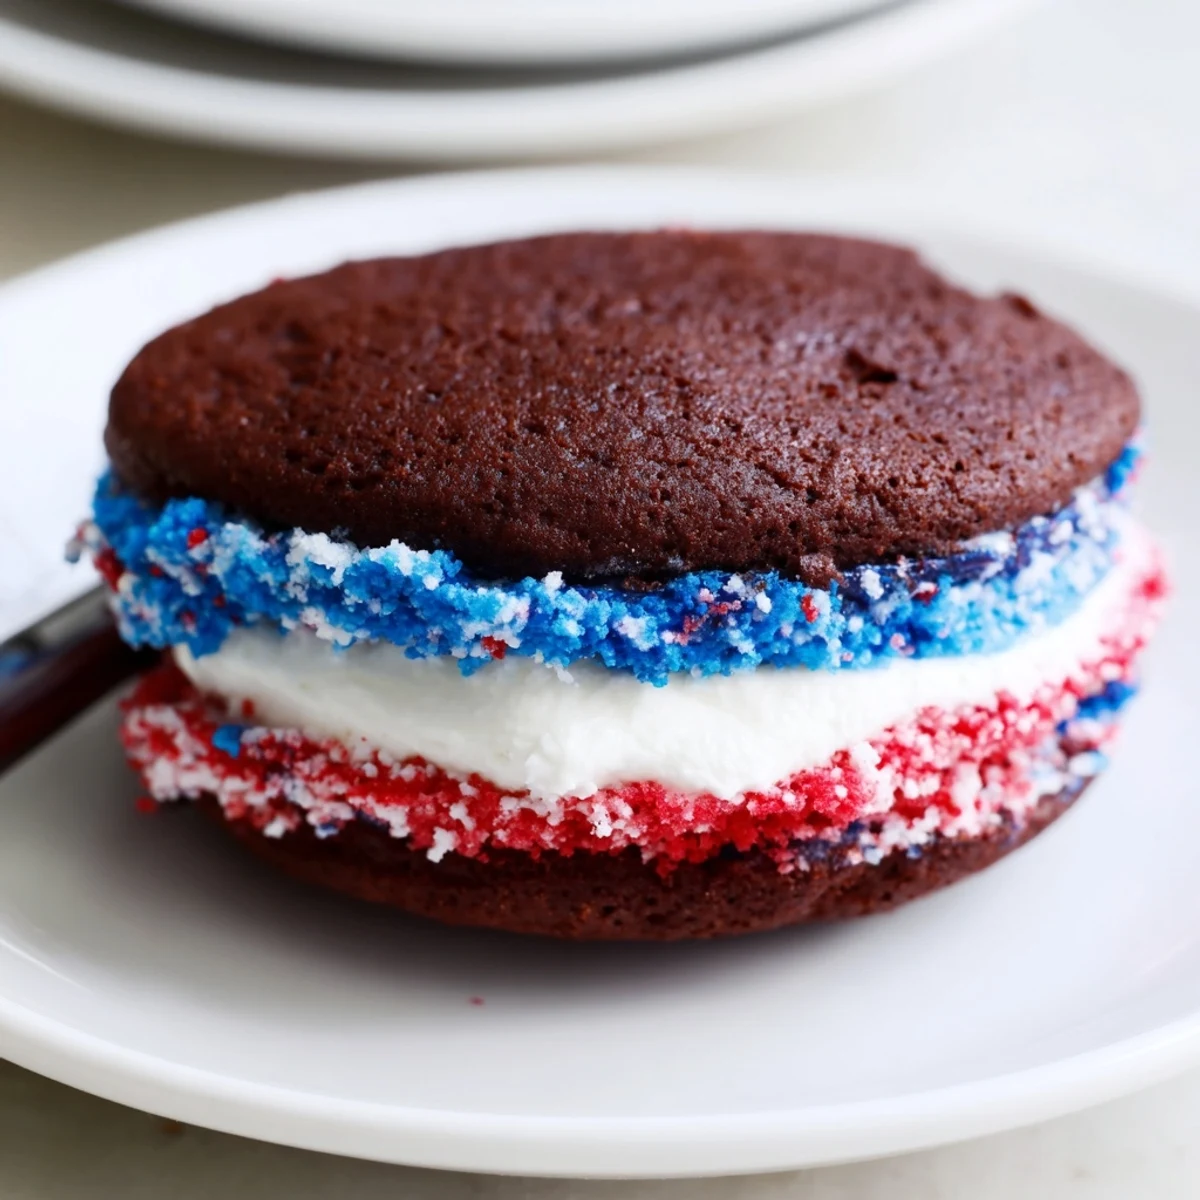
Save Soft cocoa rounds are piped or spooned onto parchment and baked at 350°F until springy, then cooled. A marshmallow buttercream is whipped, divided and tinted red, white and blue, then piped between halves to form sandwiches. Chill assembled treats for cleaner handling and roll edges in sprinkles. Use gel colors for bright hues and swap in a gluten-free flour blend if needed; yield about 12 sandwiches.
The unmistakable aroma of chocolate mingling with sweet vanilla filled my kitchen as I piped swirls of red, white, and blue filling between pillowy cakes. Making these patriotic whoopie pies wasn’t planned—I’d only meant to make plain chocolate, but the idea to tint the cream and shower everything in sprinkles hit when I spotted the flag decorations piled up for July. Now, every time I bake them, the kitchen gets a little bit more festive, no matter the weather outside. Something about their playful colors inevitably draws everyone in for a taste, and I secretly love the smudges of frosting left on fingertips.
The first batch ever came together on a humid July afternoon when the AC barely kept up, and by the time my family wandered in, I’d dusted the counters and myself in powdered sugar. My niece claimed the biggest one with the most blue filling, while my brother tried to sneak extras for his road trip snacks. Laughter and crumbs—plus a few streaks of red dye on my palms—marked a recipe instantly worth repeating. That day, patriotic whoopie pies became a new summer tradition in my house, and not just for the holidays.
Ingredients
- All-purpose flour: Gives the cakes their soft, sturdy structure—sift it for the fluffiest texture.
- Unsweetened cocoa powder: Deepens the chocolatey flavor; use natural, not Dutch-process, for proper rise.
- Baking soda: Lifts the batter so each pie dome is pillow-like.
- Salt: Just a pinch sharpens the sweetness—don't skip it!
- Granulated sugar: Creams well with butter to create a lighter crumb.
- Unsalted butter: Room temperature ensures the batter and filling mix to perfect smoothness.
- Large egg: Binds everything together and adds a subtle richness.
- Buttermilk: Makes cakes extra moist and tender with a gentle tang—shake the carton well before pouring.
- Vanilla extract: Rounds out the flavors in both cake and filling; the real stuff makes all the difference.
- Powdered sugar: Dissolves into the filling for that signature cloudlike softness.
- Marshmallow creme: The secret to fluffy, sticky-sweet centers everyone fights for.
- Red and blue food coloring: Gel versions keep the filling vibrant without watering it down.
- Patriotic sprinkles: Instantly festive—press them in gently so they stick around the edges.
Instructions
- Preheat and prep:
- Set the oven to 350°F and line two baking sheets with parchment so nothing sticks, even in the stickiest summer heat.
- Mix dry ingredients:
- Whisk together flour, cocoa, baking soda, and salt until everything is even—watch little puffs of cocoa swirl in the bowl.
- Cream the butter and sugar:
- Beat butter and sugar until pale and airy; you'll hear the beaters change pitch when it's perfect.
- Add egg and combine:
- Crumble in the egg and watch it blend, then add buttermilk and vanilla, alternating with your flour mix until the batter is silky.
- Shape the cakes:
- Drop small scoops of batter onto pans—leave space, they’ll spread and puff up.
- Bake until set:
- 10–12 minutes is just enough; they should spring back when prodded, not leave a dent.
- Cool completely:
- Let them sit on a rack, otherwise the filling will melt and ooze out the sides.
- Whip up the filling:
- Beat softened butter, powdered sugar, marshmallow creme, vanilla, and pinch of salt until billowy—prepare for sneaky tastes!
- Tint and divide:
- Split the filling; tint two parts with red and blue gels, leaving one bright white.
- Assemble your pies:
- Squeeze or spoon filling onto half the cakes, then gently sandwich them with the rest.
- Decorate for the occasion:
- Roll the edges in sprinkles, or pipe festive bands of filling on top for extra cheer.
 Save
Save At my last block party, a neighbor called these 'tiny edible flags' as she reached for seconds, and soon kids started comparing tongue colors from the frosting. What started as a new dessert quickly became an icebreaker, shared between old friends and new arrivals alike. More than once, someone asked for the recipe—proof that kitchen joy can be as contagious as laughter.
Colorful Baking Made Simple
Adding swirled colors to the filling is as fun as it looks—and a lot less fussy than you’d think. I swirl with a butter knife right before piping so each whoopie pie turns out a little different, almost like edible fireworks. If you get smudges on your hands or counter, just call it part of the holiday fun.
Make-Ahead Party Tricks
These whoopie pies can be baked and assembled ahead of time—just pop them in the fridge, tightly covered. The chill makes handling (and transporting) them much easier, especially on warm days. I’ve even frozen unfilled cakes in a pinch, letting them thaw just before adding the frosting.
Creative Toppings and Twists
Sometimes I roll the assembled pies in a plate of crushed freeze-dried berries for an extra punch of flavor or swap in different sprinkle shapes for other occasions. Mini chocolate chips look just as festive, or you can dab a second swirl of colored frosting on top for extra flair.
- Wipe your piping bag tip between colors so lines stay bright.
- Press sprinkles into the edge as soon as you sandwich, before the filling sets.
- Letting them chill for 30 minutes makes for neater slices and bold layered colors.
 Save
Save When you bring these to the table, watch how quickly conversation turns to smiles and sticky fingers. May every colorful bite remind you that a little bit of whimsy always has a place in the kitchen.
Recipe Questions
- → How do I achieve bright red and blue colors?
-
Use concentrated gel or paste food coloring rather than liquid dye. Add a little at a time, mix fully, and adjust until you reach the desired shade. Gel colors give vivid hues without thinning the filling.
- → What bake time ensures tender, cake-like rounds?
-
Bake at 350°F for 10–12 minutes, or until the tops spring back when touched. Avoid overbaking to keep the rounds soft and tender; timing may vary slightly by oven and scoop size.
- → Can I make these ahead and how should I store them?
-
Assembled whoopie sandwiches keep in an airtight container at room temperature for up to 3 days or in the fridge for up to 5 days. Chill briefly after assembling for cleaner handling. Freeze layers or assembled sandwiches up to 1 month, thawing in the fridge.
- → How do I get neat, uniform rounds every time?
-
Use a cookie scoop or piping bag to portion batter evenly and space rounds about 2 inches apart. Bake on parchment and allow to cool fully before filling to prevent squashing when you assemble.
- → Are there suitable substitutions for dietary restrictions?
-
For gluten-free, use a 1:1 gluten-free flour blend with xanthan gum. For dairy-free, swap in plant-based butter and a non-dairy buttermilk (non-dairy milk + vinegar). For egg-free, try a commercial egg replacer or a flax egg, though texture may vary.
- → What's the best way to assemble and decorate the edges?
-
Pipe or spoon filling onto one cake half, top with the matching half, then chill 20–30 minutes for firmer edges. Roll the exposed filling in sprinkles or pipe extra frosting on top for extra flair.
