 Save
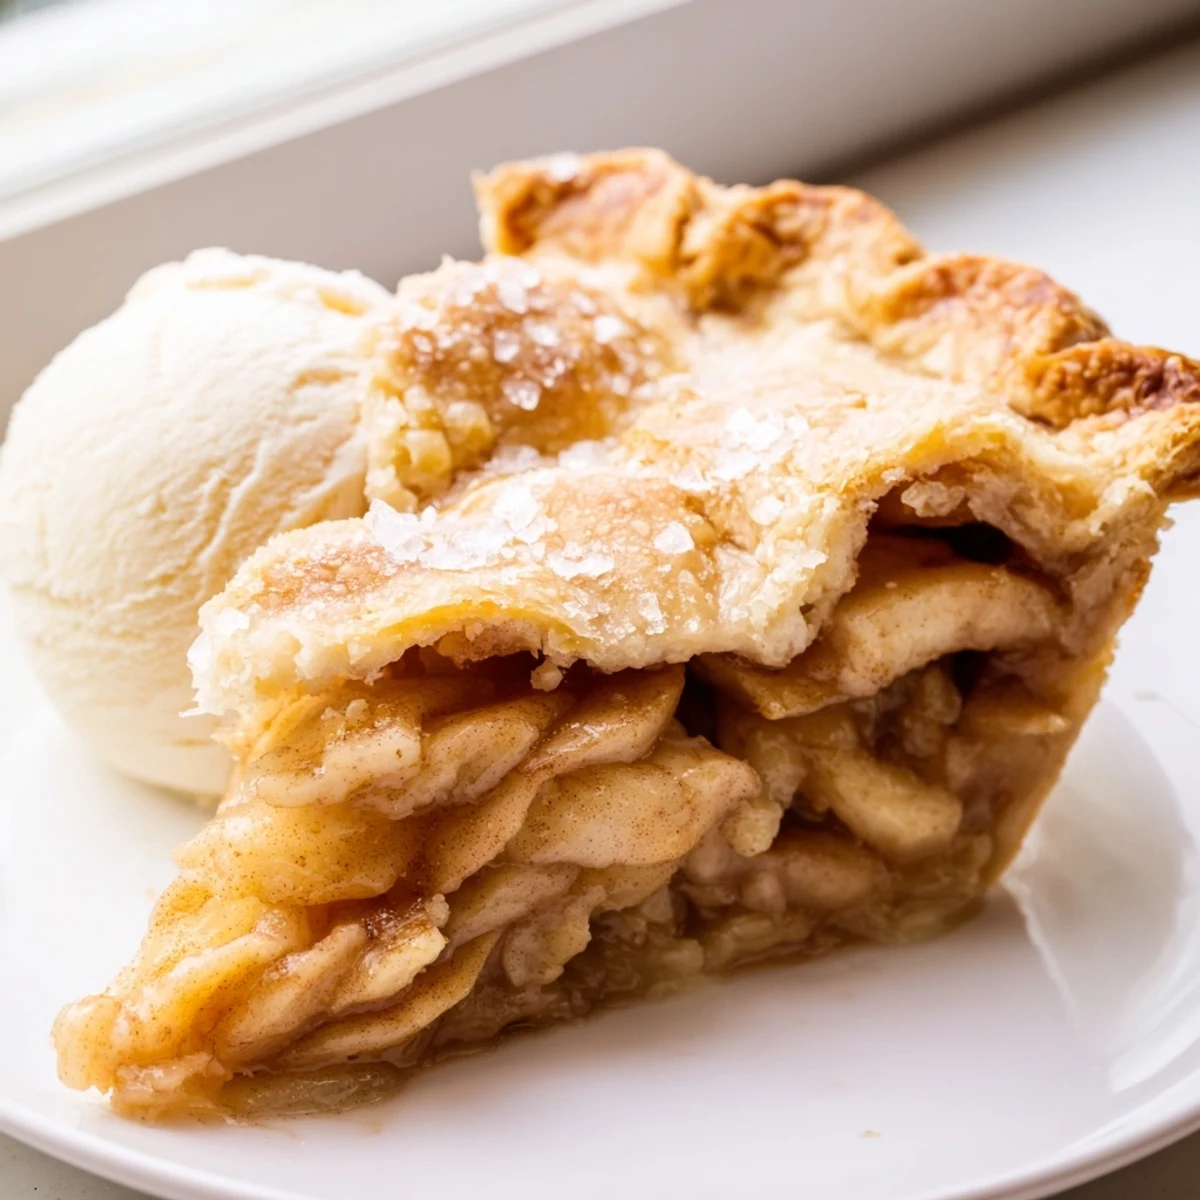
Save This beloved American dessert combines tender, spiced apples with a flaky, buttery homemade crust. The filling features tart Granny Smith apples tossed with cinnamon, nutmeg, cloves, and just the right amount of sugar. After baking until golden brown, the result is a warm, comforting treat that's perfect on its own or topped with vanilla ice cream. The double crust seals in all the delicious juices while developing that irresistible golden finish.
The first time I attempted apple pie, I used a pre-made crust from the grocery store and cried when my grandmother gently suggested next time we make it from scratch together. That afternoon in her tiny kitchen, with flour dusting every surface and Frank Sinatra playing softly, I learned that good pie requires patience and cold hands. Now, every autumn without fail, my house fills with cinnamon and butter as I carry on that ritual.
Last October, my neighbor knocked on my door holding a bag of apples from her tree, asking if I knew what to do with windfalls. We spent the entire afternoon peeling and slicing, trading family stories while her kitchen filled with the smell of baking pie. Her husband came home from work and immediately took off his tie, claiming he could smell autumn from the driveway.
Ingredients
- 2 1/2 cups all-purpose flour: This forms the foundation of your crust, and Ive learned through many failed attempts that measuring by weight instead of volume gives you the most consistent results
- 1 cup unsalted butter, cold and cubed: The cold butter is what creates those flaky layers we all love, so keep it in the fridge until the absolute last moment
- 1 tsp salt: A little salt enhances the sweetness without making the crust taste salty
- 1 tbsp granulated sugar: Just enough to help the crust brown beautifully and give a hint of sweetness
- 6 to 8 tbsp ice water: Youll need enough to bring the dough together, but adding it gradually is the secret to avoiding a tough crust
- 6 cups tart apples: Granny Smiths are my go-to because they hold their shape during baking and provide that perfect contrast to the sweet filling
- 3/4 cup granulated sugar: Sweetens the tart apples without overpowering their natural flavor
- 1/4 cup packed brown sugar: Adds a deeper, caramel-like flavor that white sugar alone cant achieve
- 2 tbsp all-purpose flour: This thickens the juices as the apples cook, preventing a soggy bottom crust
- 1 tbsp lemon juice: Brightens the filling and keeps the apples from oxidizing too quickly
- 1 1/2 tsp ground cinnamon: The classic spice that makes everything smell like home
- 1/4 tsp ground nutmeg: Adds warmth and complexity that people notice but cant quite place
- 1/8 tsp ground cloves: Just a pinch goes a long way in giving the filling depth
- 1/4 tsp salt: Balances the sweetness and enhances all the spices
- 2 tbsp unsalted butter, cut into small pieces: Dotting the top of the filling creates little pockets of buttery richness throughout
- 1 egg, beaten with 1 tbsp milk: This egg wash gives the crust that gorgeous golden finish that makes everyone say wow before they even take a bite
- 1 tbsp coarse sugar: Optional but worth it for that bakery-quality sparkle and crunch on top
Instructions
- Prepare the Pie Crust:
- In a large bowl, whisk together the flour, salt, and sugar until well combined. Cut in the cold butter using a pastry cutter or your fingertips until the mixture resembles coarse crumbs with some pea-sized pieces remaining. Gradually add the ice water, tossing with a fork after each addition, until the dough just begins to come together when pressed. Divide the dough in half, shape each half into a flat disc, wrap tightly in plastic, and refrigerate for at least 1 hour or up to 2 days.
- Prepare the Apple Filling:
- In a large bowl, combine the sliced apples with both sugars, flour, lemon juice, cinnamon, nutmeg, cloves, and salt. Toss everything together until the apples are evenly coated. Let the mixture sit for about 10 minutes while you roll out the dough.
- Roll Out the Bottom Crust:
- On a lightly floured surface, roll one dough disc into a 12-inch circle, rotating frequently to prevent sticking. Carefully transfer the dough to a 9-inch pie dish, gently pressing it into the bottom and up the sides. Trim any excess dough, leaving about an inch overhang.
- Fill the Pie:
- Transfer the apple mixture into the prepared crust, mounding the apples slightly higher in the center. Dot the top of the filling with the small pieces of butter.
- Add the Top Crust:
- Roll out the second dough disc into another 12-inch circle and carefully place it over the apples. Trim the edges, then fold and crimp the top and bottom crusts together to seal. Cut 4 or 5 small slits in the top crust to allow steam to escape during baking.
- Apply the Egg Wash:
- Whisk together the egg and milk in a small bowl until combined. Brush the mixture evenly over the entire top crust, then sprinkle with coarse sugar if using.
- Bake the Pie:
- Place the pie on a baking sheet to catch any drips. Bake at 425°F for 20 minutes, then reduce the temperature to 375°F and continue baking for 35 to 40 minutes more. The crust should be deep golden brown and the filling should be bubbling visibly through the vents.
- Cool Completely:
- Let the pie cool on a wire rack for at least 2 hours before slicing. This waiting period is torture, but it allows the filling to set properly so you get clean slices instead of a mess.
 Save
Save My daughter asked me to teach her how to make this pie last weekend, and watching her clumsy attempts at crimping the crust took me right back to my grandmothers kitchen. We may have had flour in our hair and butter on our noses, but that pie turned out perfect.
Getting That Perfect Crust
The temperature of your ingredients makes all the difference in achieving those coveted flaky layers. Keep everything cold, work quickly, and resist the urge to overwork the dough. I keep my flour in the freezer for especially hot days, and I run my hands under cold water before starting.
Choosing the Right Apples
Not all apples are created equal when it comes to pie baking. You want apples that hold their shape during baking but still become tender when cooked. I often mix different varieties for more complex flavor, but always include at least half tart apples to balance the sugar.
Serving Suggestions
While this pie needs no accompaniment to be absolutely perfect, a scoop of vanilla ice cream melting over a warm slice creates a contrast of temperatures that is pure heaven. The pie also freezes beautifully for up to 3 months if you want to get ahead for holiday entertaining.
- Try serving with a slice of sharp cheddar cheese on the side for a sweet and savory combination that might surprise you
- A dollop of crème fraîche adds a tangy richness that cuts through the sweetness
- Leftover pie, if there is any, makes an incredible breakfast the next morning, no judgment here
 Save
Save There is something profoundly satisfying about serving a homemade apple pie to the people you love. The house smells like comfort, the table looks beautiful, and suddenly everyone wants to stay a little longer.
Recipe Questions
- → What type of apples work best?
-
Tart varieties like Granny Smith hold their shape beautifully during baking and provide a lovely contrast to the sweet spiced filling. You can also mix in Honeycrisp or Braeburn for added sweetness.
- → Why must the pie cool before slicing?
-
Cooling for at least two hours allows the filling to set properly. If you cut too soon, the juices will run out instead of thickening up around each apple slice.
- → Can I make the dough ahead?
-
Absolutely. The dough discs can be wrapped and refrigerated for up to three days or frozen for up to three months. Thaw overnight in the refrigerator before rolling.
- → Why does the oven temperature change during baking?
-
Starting at 425°F helps quickly set the crust structure, then reducing to 375°F ensures the apples cook through completely without burning the pastry edges.
- → What's the purpose of the egg wash?
-
Brushing the top crust with beaten egg and milk creates that gorgeous golden-brown finish and helps coarse sugar adhere if you choose to add that extra sparkle.
- → How do I know when it's done baking?
-
The crust should be deep golden brown, and you should see the filling bubbling actively through the steam vents. If the edges brown too quickly, cover them with foil.
