 Save
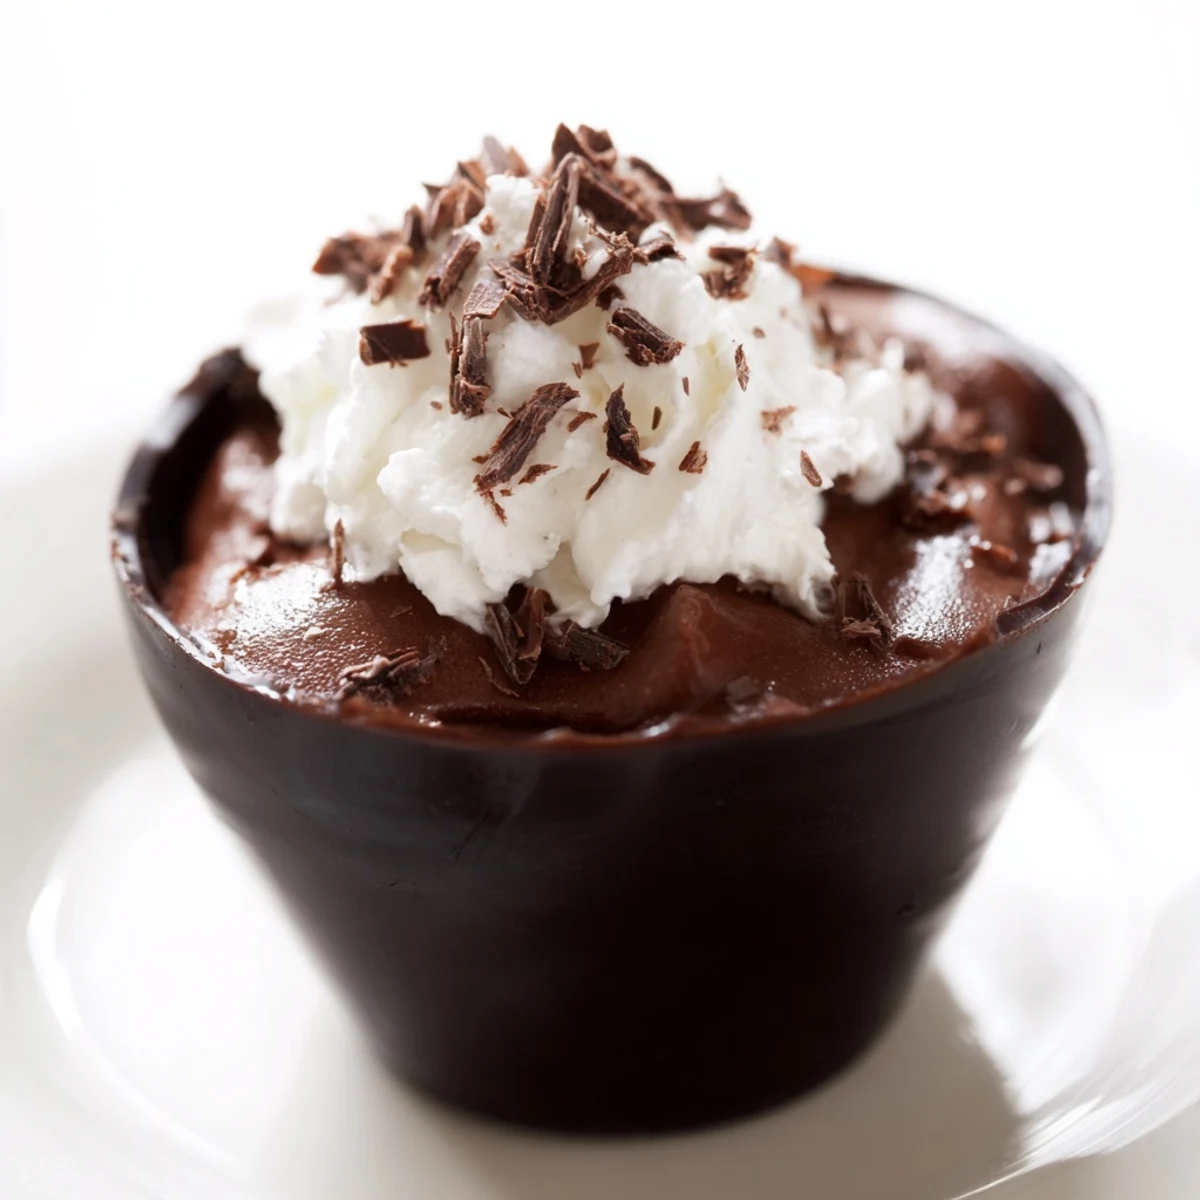
Save This creation features delicate cups made from dark chocolate, filled with a rich, creamy mousse blending melted chocolate, egg yolks, whipped cream, and softly beaten egg whites for lightness. The mousse sets chilled inside the firm chocolate shell, creating a delightful contrast of textures. Finished with a dollop of sweetened whipped cream and garnished with chocolate shavings or cocoa powder, it offers an elegant dessert ideal for entertaining or special moments.
There's something magical about the moment when melted chocolate hardens into its own edible vessel—I discovered this trick while trying to impress someone at a dinner party, and it completely changed how I think about plating desserts. These chocolate cups are deceptively simple to make, yet they feel like the kind of thing a pastry chef would create, and honestly, once you nail the technique, you'll want to fill them with everything from mousse to ice cream. I still remember the quiet satisfaction of peeling away that first silicone mold and seeing a perfect chocolate shell emerge, ready to hold something decadent.
I made these for a friend's birthday dinner once, and watching her eyes light up when she realized the cup was chocolate—that she could eat the whole thing—was worth every minute of careful brushing and chilling. There's something inherently romantic about an individual plated dessert, especially when it's handmade and a little bit surprising in its construction.
Ingredients
- Dark chocolate (60% cocoa minimum): I use 200g for the cups and 150g for the mousse—higher cocoa percentages give you that sophisticated bitterness that balances the sweetness, though don't stress if you only have one type on hand.
- Large eggs: Room temperature ones whip up faster and give you better volume, and separating them carefully means no yolk sneaking into your whites.
- Granulated sugar: Two tablespoons total gets divided between the yolks and whites to stabilize both components.
- Heavy cream: Use the chilled stuff straight from the fridge, and measure out 150ml for the mousse plus another 100ml for whipping the topping.
- Vanilla extract: One teaspoon is enough to add warmth without overpowering the chocolate.
- Powdered sugar: One tablespoon sweetens the whipped cream topping without adding grittiness.
- Salt and garnish: A pinch of salt in the egg whites makes them whip up glossier, and chocolate shavings or cocoa powder finish everything beautifully.
Instructions
- Melt and brush the chocolate:
- Chop your 200g of dark chocolate and melt it in a heatproof bowl set over gently simmering water, stirring until smooth. This double-boiler method keeps the chocolate from seizing. Working with a pastry brush, coat the inside of each silicone muffin mold or paper cupcake liner with a thin, even layer—think of it like painting the inside of a tiny edible bowl.
- Build the chocolate walls:
- Pop your first-coated molds into the fridge for 10 minutes until the chocolate sets, then paint on a second coat for sturdier walls. Let them chill completely until solid, about 30 minutes, and you'll have shells strong enough to hold your mousse without cracking.
- Release your chocolate vessels:
- Gently peel away the silicone or paper to reveal perfect chocolate cups. This is the moment of truth—if they stick, pop them back in the fridge for a few minutes.
- Prepare the mousse base:
- Melt your 150g of chocolate and let it cool slightly so the eggs don't scramble when you fold them in. While it cools, beat the egg yolks with 1 tablespoon of sugar in a separate bowl until they're pale, thick, and ribbony—this takes a few minutes with a mixer.
- Build your egg foam:
- Whip the egg whites with a pinch of salt in a clean, grease-free bowl until soft peaks form, then gradually add the remaining 1 tablespoon of sugar, beating until the mixture is glossy and holds stiff peaks. This foam is what makes the mousse light instead of dense.
- Whip the cream:
- In another bowl, whip 150ml of cold heavy cream until soft peaks form—don't overdo it or you'll have sweet butter.
- Fold everything together:
- Stir the cooled chocolate into your egg yolk mixture along with the vanilla, then gently fold in the whipped cream first, then the egg whites in two additions, moving the spatula slowly and folding from the bottom up. The key is keeping all that air you worked so hard to create.
- Fill and chill:
- Spoon or pipe the mousse into your chocolate cups and refrigerate for at least 1 hour until the mousse sets and holds its shape.
- Top and serve:
- Whip the chilled 100ml of cream with 1 tablespoon of powdered sugar until soft peaks form, then dollop or pipe it over each mousse cup. Finish with a scatter of chocolate shavings or a light dusting of cocoa powder and serve cold.
 Save
Save The first time I successfully unmolded a chocolate cup without it shattering, I felt like I'd unlocked a secret language of the kitchen. Now, every time I make these, there's that quiet moment of suspense before the shell releases, and then relief and pride wash over me in equal measure.
The Magic of Double-Boiler Technique
Melting chocolate over direct heat is a shortcut to disaster—it can scorch, seize, or turn grainy in seconds. A heatproof bowl suspended over barely simmering water gives you gentle, even heat that won't damage the chocolate's delicate structure. I learned this the hard way after ruining a batch by getting impatient, and now I always pause to set up the water bath properly; it takes an extra minute but saves everything that comes after.
Why Individual Portions Matter
There's psychology in plating—a whole dessert on a plate feels homey and generous, but an individual edible cup feels curated and special, like someone took time to think about you specifically. These are the kinds of desserts that stick in memory not just because they taste incredible, but because their presentation tells a story of care. Plus, there's zero guilt in having just one perfectly portioned serving sitting prettily in front of you.
Flavor Variations and Pairings
While this recipe is beautiful as written, it's also a blank canvas for experimentation. A splash of orange liqueur stirred into the mousse adds a bright, sophisticated edge, espresso powder deepens the chocolate intensity, or you could go entirely different with a hint of cinnamon or cardamom. Serve with strong black coffee, ruby port, or even a dessert wine, and suddenly this simple mousse becomes the centerpiece of an entire experience.
- Add 1 tablespoon of liqueur or 1 teaspoon of instant espresso to the melted chocolate for an instant flavor upgrade.
- Use milk chocolate instead of dark if you prefer sweeter, more approachable chocolate, though the sophistication factor drops slightly.
- Make the cups up to 3 days ahead and store them in an airtight container in the fridge so assembly on the day of is stress-free.
 Save
Save There's something timeless about a chocolate dessert that feels both simple and sophisticated. Make these cups, fill them with mousse, and watch how quickly they disappear from the plate.
Recipe Questions
- → How do I make the chocolate cups?
-
Melt dark chocolate and brush it inside silicone molds or liners. Chill twice to build firm layers before carefully removing molds to keep the cups intact.
- → What ensures the mousse is light and airy?
-
Folding softly whipped cream and stiffly beaten egg whites into the chocolate mixture creates a fluffy, melt-in-your-mouth texture.
- → Can I adjust sweetness or flavor?
-
Adding a splash of orange liqueur or espresso enriches the mousse, while milk chocolate can be used for a sweeter finish.
- → How long should chilling take?
-
After assembling, refrigerate the mousse-filled cups for at least one hour to allow proper setting and flavor melding.
- → What toppings complement this dessert?
-
Whipped cream sweetened with powdered sugar and garnishes like chocolate shavings or cocoa powder add the perfect final touch.
