 Save
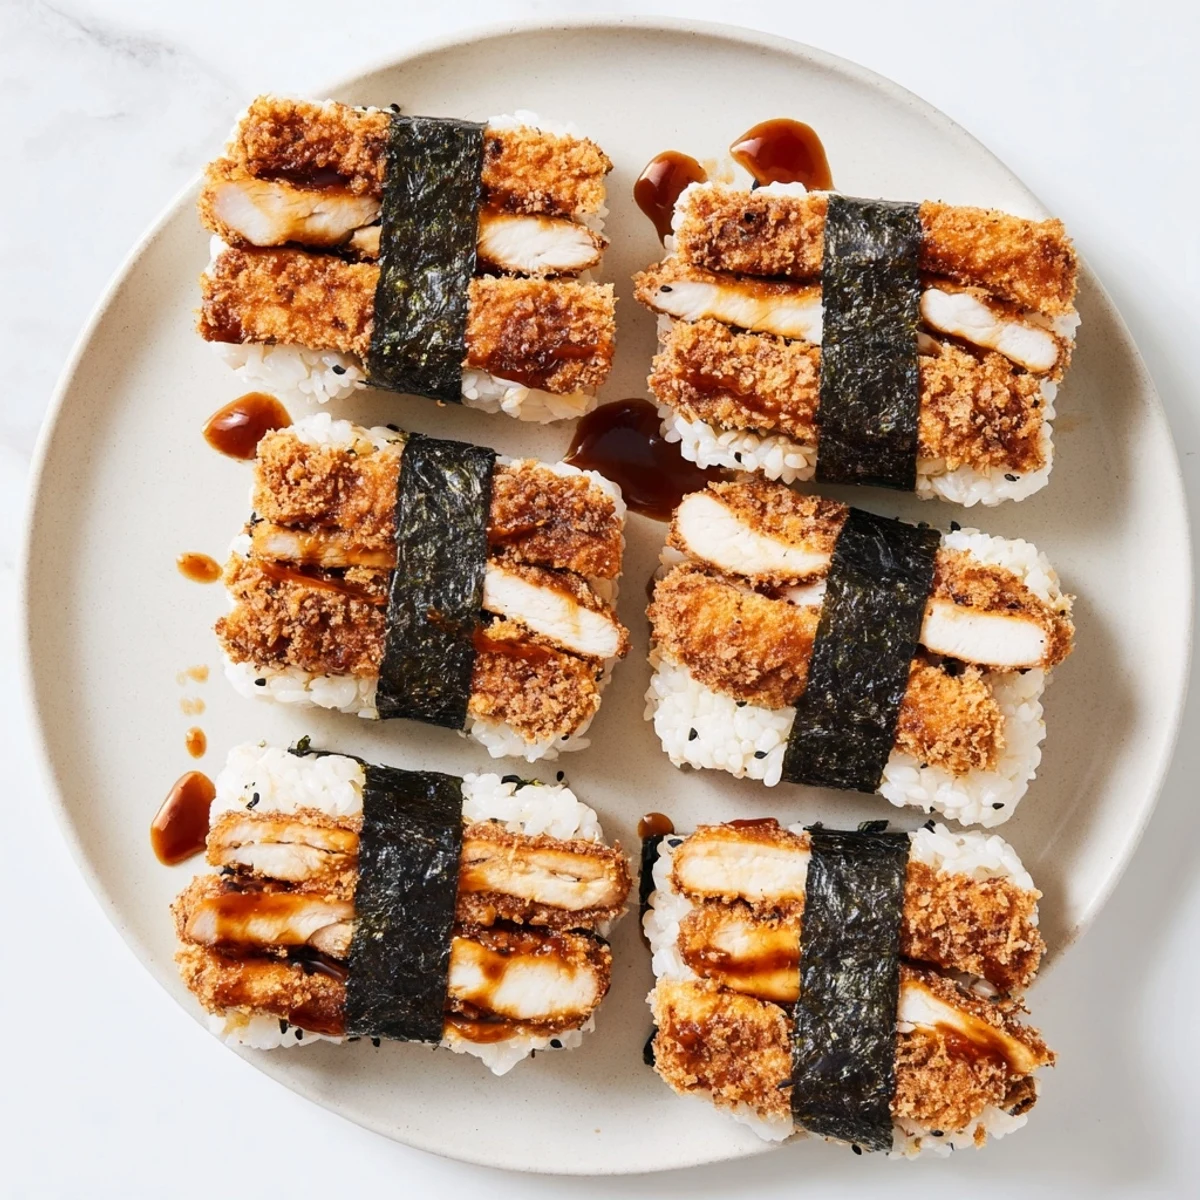
Save This Hawaiian-Japanese fusion combines crispy panko-coated chicken thighs with vinegar-seasoned short-grain rice, all wrapped in toasted nori sheets. The chicken gets pounded thin, breaded, and fried until golden, then paired with a sweet-savory tonkatsu-soy sauce blend. Each musubi forms a compact rectangular block perfect for grabbing and going.
The key lies in warm, properly seasoned rice and pressing firmly so the nori seals everything together. The result delivers crunch from the chicken, softness from the rice, and umami from the seaweed wrapper. Serve immediately while the chicken stays crispy, or pack for an impressive portable meal.
I stumbled onto chicken katsu musubi during a beach day in Waikiki when a friend handed me a neatly wrapped bundle from her cooler. The crisp chicken against warm vinegared rice made complete sense in that ocean air. Now I make these whenever I need something that feels like vacation but comes together faster than takeout.
My sister once ate five of these straight from the plastic wrap while I was still frying the last batch. She claimed she was just quality control but I found sauce on her chin. That moment taught me these disappear faster than you can assemble them.
Ingredients
- Boneless chicken thighs: Thighs stay juicier through the frying process and handle the pressing step better than breast meat
- Panko breadcrumbs: The coarse flakes create that signature shattering crunch that regular breadcrumbs cannot achieve
- Short-grain Japanese rice: This variety sticks together enough to hold its shape when wrapped but still yields to the bite
- Rice vinegar mixture: The subtle acidity cuts through the fried chicken and adds that authentic musubi flavor
- Tonkatsu sauce blend: Mixing in soy and honey balances the store-bought sauce into something more complex and personal
- Nori sheets: Halved standard sheets wrap perfectly around individual portions
Instructions
- Prep the chicken:
- Pound the thighs between plastic wrap until even then season with salt and pepper on both sides
- Set up your breading station:
- Arrange flour in one shallow dish, beat the egg with milk in another, and spread panko in a third
- Coat each thigh:
- Dredge in flour, dip in egg mixture, then press firmly into panko to ensure an even layer that will not fall off during frying
- Fry until golden:
- Heat oil in a skillet over medium heat and cook chicken about 3 to 4 minutes per side until deep golden brown
- Rest and slice:
- Drain on paper towels for a couple minutes then cut into strips that fit your musubi mold
- Season the rice:
- Whisk rice vinegar, sugar, and salt until dissolved then gently fold into warm cooked rice
- Mix your sauce:
- Combine tonkatsu sauce, soy sauce, and honey in a small bowl until smooth
- Start wrapping:
- Lay plastic wrap on your work surface then place a halved nori sheet shiny side down on top
- Layer your musubi:
- Press about one quarter cup of seasoned rice into a rectangle, add furikake if using, top with chicken, drizzle with sauce, then add another thin layer of rice
- Wrap it up:
- Use the plastic wrap to fold the nori tightly around the filling while pressing everything into a compact rectangle
- Let them rest:
- Wait 2 to 3 minutes for the nori to soften and seal before removing the plastic wrap
 Save
Save These became my go-to contribution to potlucks after watching coworkers fight over the last one at a office lunch. Something about that handheld format makes people feel taken care of.
Making Ahead
You can fry and slice the chicken up to two days ahead then store it in the refrigerator. The rice is best prepared the day you plan to assemble but you can freeze fully wrapped musubi for up to a week.
Sauce Variations
Sometimes I skip the honey and add a squirt of sriracha when I want heat instead of sweetness. A splash of orange juice works beautifully too and reminds me of the teriyaki fusion spots in Honolulu.
Perfecting Your Wrap Technique
The plastic wrap is your friend here because it lets you press firmly without the nori tearing. Work quickly and confidently once you start folding.
- Keep a small bowl of water nearby for wetting your fingers
- Use kitchen shears to cut through several nori sheets at once
- Label your freezer packs with the date so you use the oldest first
 Save
Save Wrap these up and call it lunch. Your future self will thank you for the effort.
Recipe Questions
- → What makes musubi different from sushi?
-
Musubi uses pressed rice blocks rather than hand-rolled shapes, typically features heartier fillings like fried proteins, and wraps completely in nori for easy handling. The rice remains warm during assembly, creating softer texture than chilled sushi.
- → Can I prepare these ahead of time?
-
Best enjoyed fresh for optimal crispiness, but musubi holds well for 4-6 hours when wrapped tightly in plastic. The nori will soften over time, so pack the sauce separately if taking for lunch. Avoid refrigerating as the rice hardens and texture suffers.
- → What's the best rice for musubi?
-
Short-grain Japanese rice (sushi rice) works best due to its sticky texture and ability to hold together when pressed. Long-grain varieties fall apart and won't form compact blocks. Use warm rice - cold rice won't bind properly and creates dry texture.
- → How do I get the crispiest chicken?
-
Pound chicken to even thickness for uniform cooking. Let coated pieces rest 10 minutes before frying to help breading adhere. Double-fry technique adds extra crunch: fry at 350°F first, then increase heat to 375°F for 30-second second fry. Drain on wire rack, not paper towels.
- → Can I use store-bought chicken katsu?
-
Absolutely. Pre-made frozen or deli chicken katsu works in a pinch, though homemade offers superior crunch and seasoning control. If using prepared chicken, warm briefly before assembling and skip the frying steps. Slice to fit your musubi mold dimensions.
- → What can I substitute for tonkatsu sauce?
-
Mix equal parts ketchup, Worcestershire sauce, and oyster sauce with a dash of soy sauce. Or blend Bulldog sauce with honey. For homemade, combine tomato paste, soy sauce, sugar, apple juice, and garlic. The sauce balances the rich fried chicken with tangy sweetness.
